

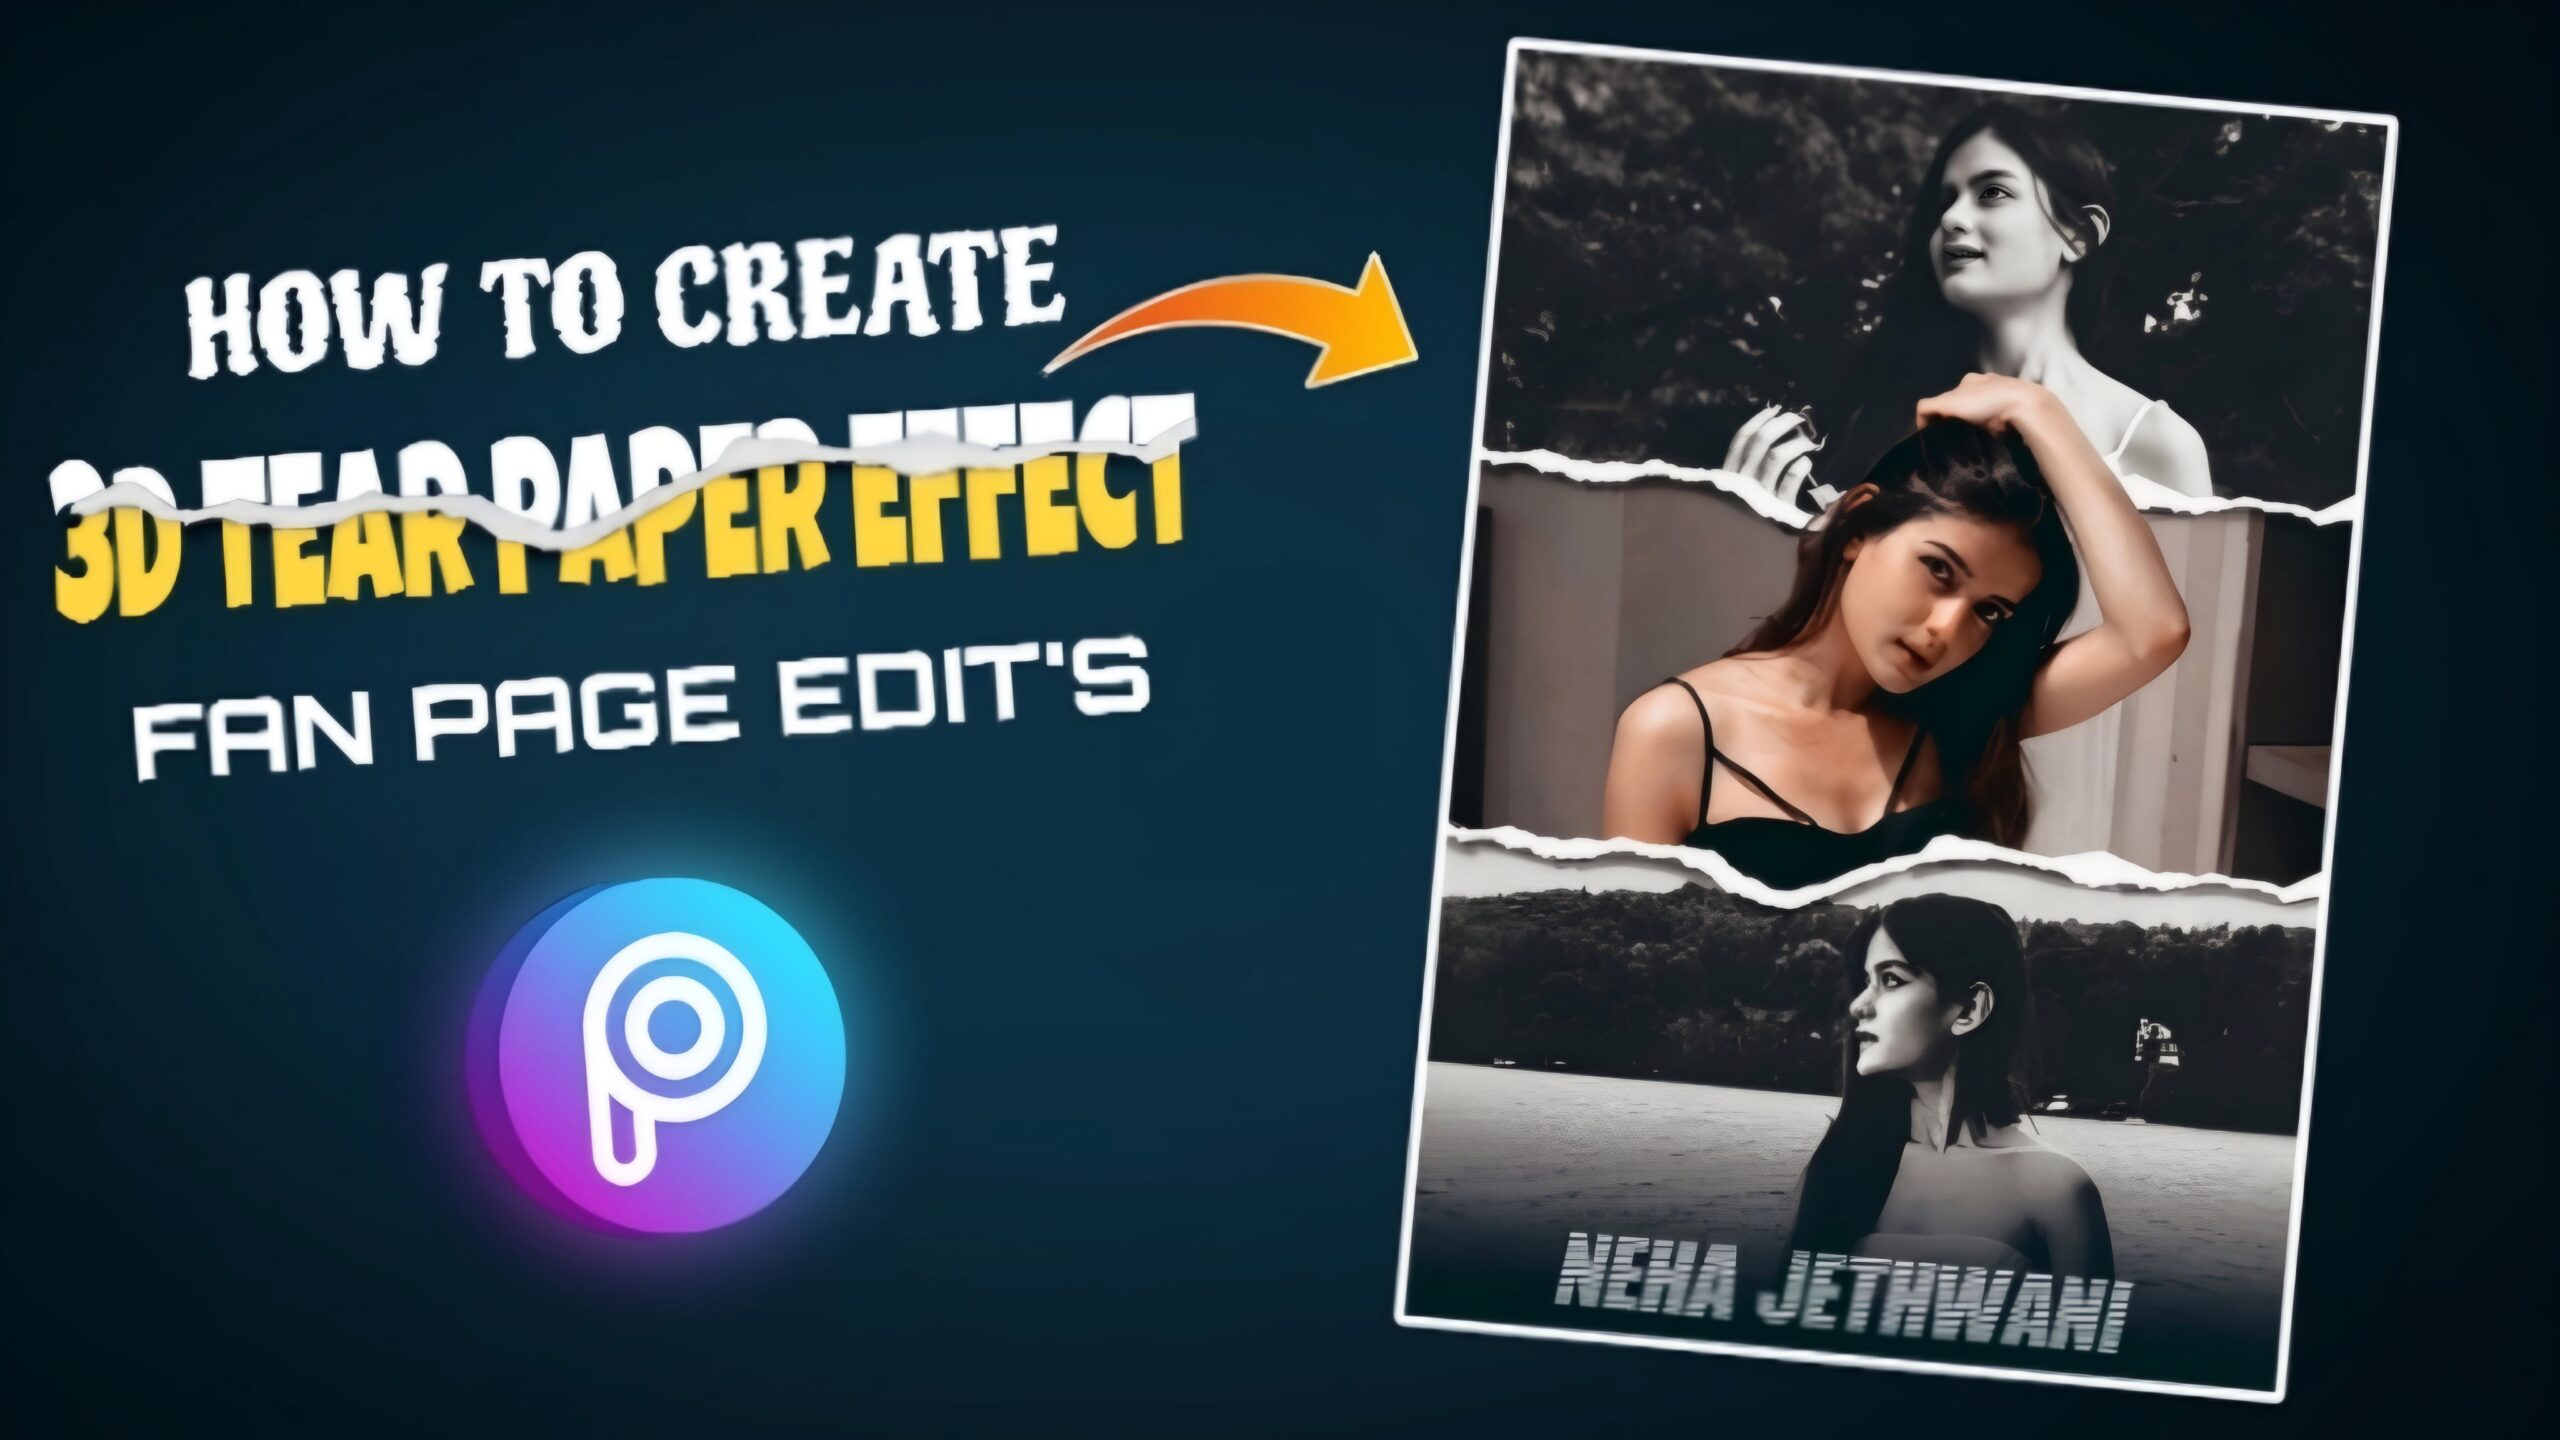
TEAR PAPER 3D EFFECT PHOTO EDITING
Hlo Guys, Welcome to our website Poser Editz. So, today in this article, I am gonna show you how to create an aesthetic 3D tear paper effect photo editing in Picsart Application Step by Step and also I will be Providing all the material i used in this Edit. We gonna use the Picsart Application to create this aesthetic Tear Paper Edit. Step 1: Open the Picsart Application Step 2: Choose any Background and crop it to 3:4 ratio. Step 3: Import your photo’s(3 photo’s) and place them one above the other. Step 4: Duplicate the image which is Placed in Middle and keep it outside the frame for a while. Step 5: Now, Add the Tear Paper Png. Step 6: Place it at the Top of Second Image and Erase the extra areas of the second image which are above the tear paper png.
Step 7: Now, Duplicate the Tear Paper Png and place it on the bottom of the Second image, then erase the areas of the second image which are below the png.
Step 8: Turn the first and third images to Black and White.
Step 9: Now, we need to bring the second image duplicated one into the Frame and place it exactly above the original one.
Step 6: Place it at the Top of Second Image and Erase the extra areas of the second image which are above the tear paper png.
Step 7: Now, Duplicate the Tear Paper Png and place it on the bottom of the Second image, then erase the areas of the second image which are below the png.
Step 8: Turn the first and third images to Black and White.
Step 9: Now, we need to bring the second image duplicated one into the Frame and place it exactly above the original one.
 Step 10: Then select Erase and erase the below the Tear Paper Png.
Step 11: So, that’s it, Ya We’re Done.
Incase, if you’ve any doubts regarding the edit, then Please do Consider to Watch the Tutorial I have made to Create an Aesthetic 3D Tear Paper Edit.
So, that’s it for the article Guys, Thank you so much for Visiting our Webiste. I really appreciate it, see you again…
Step 10: Then select Erase and erase the below the Tear Paper Png.
Step 11: So, that’s it, Ya We’re Done.
Incase, if you’ve any doubts regarding the edit, then Please do Consider to Watch the Tutorial I have made to Create an Aesthetic 3D Tear Paper Edit.
So, that’s it for the article Guys, Thank you so much for Visiting our Webiste. I really appreciate it, see you again…
